Insects make great teaching tools for a wide variety of lessons in evolution & biology, but their small size can limit what you can do if you don’t have a microscope set up. Lately I’ve been playing around with a 2 megapixel USB Microscope from EmCal Scientific Inc that I picked up at the 2011 Entomological Society of America meeting in Reno, Nevada. This little device cost ~$100, and provides magnification up to 200x life size! (Note: there are similar products available around the web for cheaper, but I can’t say how well they may or may not work.)
I’ve used it in a few lectures & labs to show specimens, structures and techniques, but honestly haven’t had much success, largely because the stand it came with is pretty well useless. Hand holding it isn’t an option either, as even the slightest movement at such high magnifications turns your demonstration into a bad example of the Harlem Shake.
Despite the problems I ran in to, I really wanted to use the camera in a couple of outreach events I’ll be participating in later this month, but I couldn’t afford to invest much in a solution. So, this afternoon I went to my local big box home improvement store and wandered around until I managed to design and piece together what I think will solve a lot of the issues I was having. Here’s a breakdown of what I used and how I put it all together for less than $30.
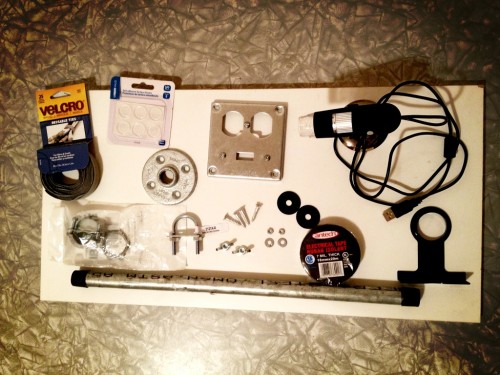
Materials:
- Particle board, preferably with a white laminate surface and large enough to provide a stable base for the stand. I found a 12″x24″ piece in the off-cuts section of my store for $1 which worked perfectly; I didn’t have to cut it down at all, AND IT WAS $1! Score.
- 1/2″x18″ Galvanized Threaded Pipe – look for this in the plumbing section. ($6.62 – the most expensive piece of this whole project)
- 1/2″ Galvanized Floor Flange – should be right beside the pipe. ($3.19)
- 4 screws – I used 1″ Aluminum screws, but probably should have used 3/4″. ($0.96)
- Black Electrical Tape – makes it look a little nicer and provides some extra grip for the camera attachment rather than just the bare metal pipe. ($0.93)
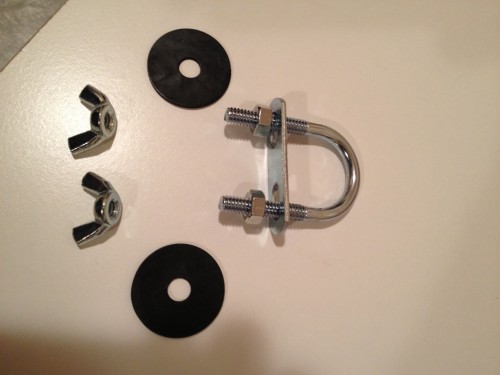
- U-Bolt Nut & Plate 1/4″x2x3/4″ ($1.29)
- 2 wingnuts – I switched the bolts on the U-Bolt to wingnuts to make it easier to loosen/tighten when adjusting the camera height. ($0.88)
- 2 Rubber Washers – another way to increase the grip of the camera mount on the vertical pipe. ($1.90)
- Electrical Cover Box with holes for 1 switch & 2 receptacles – this is the piece I’m least happy with. If you can find something else to fill this role, let me know. ($4.09)
- 2 tiny spacer washers. ($0.46)
- 2 tiny nuts – *insert inappropriate joke here*… ($0.46)
- 1.25″ Pipe Hanger – I found this near the copper piping in my store. ($2.59)
- Rubber feet – little stick on knobs to keep the stage off the table a little. ($2.79)
- An elastic band or velcro strip or something similar ($5.69 for a pack of 25 velcro strips, of which I only used 1, so ~$0.23)
Uber Easy Assembly Instructions (Take THAT IKEA)
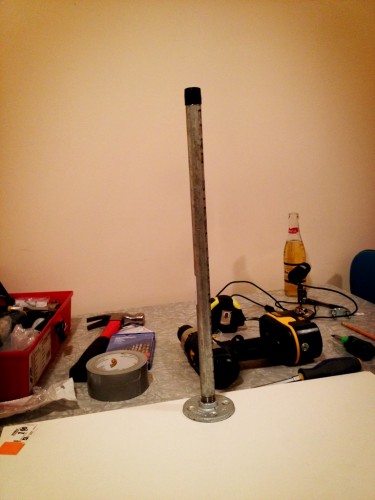
First, attach the galvanized flange to the base board with the 4 screws (ProTip: pre-drill holes in the base board), preferably near the middle of the long edge for stability sake (now would also be a good time to stick the rubber pads on the bottom of the base). Next, wrap the galvanized pipe in electrical tape, then screw it into the flange. You should now have something like this but wrapped in black tape:
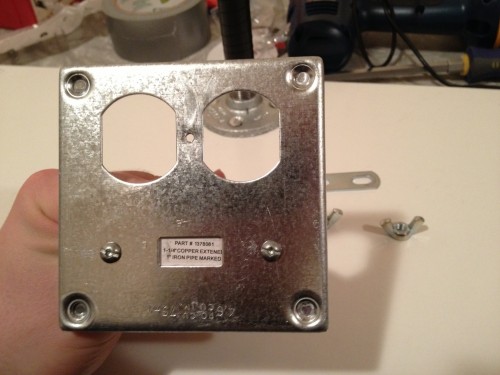
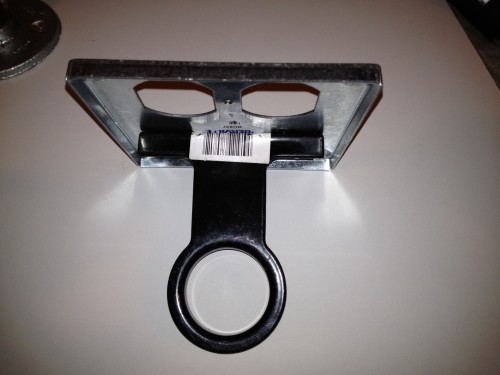
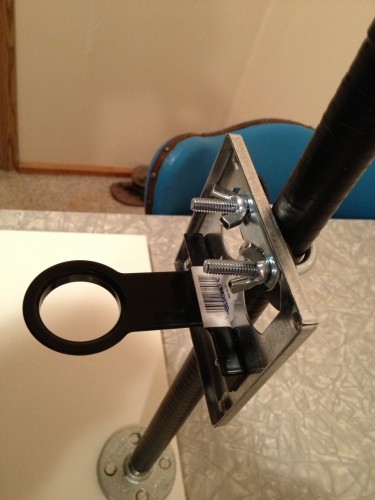
Attach the pipe holder (with the rounded edge on the top side) to the cover box using the tiny bolts on either side of the light switch hole and the tiny washers and tiny nuts (heh). Make sure these are as tight as possible.
Take the square bolts off the U-Bolt, remove the plate, put on the rubber washers, put the U-bolt through the outlet receptacle holes in the box cover (so the threaded ends are hanging out over the basketball hoop), put the plate back on, then attach the wingnuts. Slide the whole thing over the pole (with the pole going inside the U-Bolt) and tighten the wingnuts against the plate & box cover at whatever height you want.
Put an elastic/velcro band around the end of your USB microscope, then place it in the hole of the pipe holder. The elastic/velcro should create a snug fit in the ring, but allow some flexibility to straighten the camera.
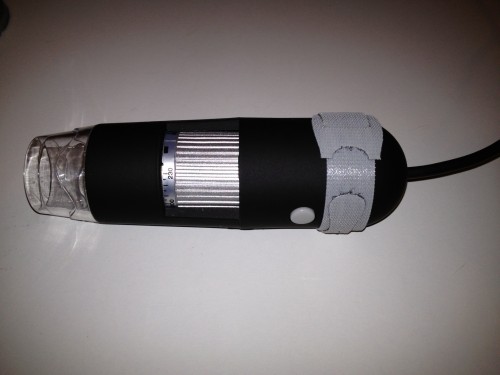
The minimum focus distance of this camera is ~1cm, which is well inside the clear plastic dome; I think I’ll grind the dome down to make it easier to work with at high magnification. The focus ring changes the magnification, so you move the camera closer or further away from the subject to focus. The grey button can be used to take still photos, but they’re pretty brutal so I don’t care that it’s concealed by the pipe holder when all put together.
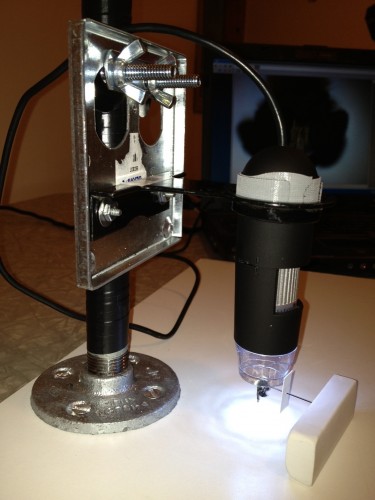
You can see the robber fly I was using to demonstrate with is tucked up inside the clear plastic dome, which places it at a high risk of accidental damage.
So there you have it, a fully functional digital microscope for less than $150! The EmCal USB Microscope has several LED lights around the camera lens, but unless you’re working at high magnification (i.e. a working distance <1″) they aren’t bright enough to illuminate the specimen; you’ll probably need an extra light source like a desk lamp or LED bank shining on the specimen.
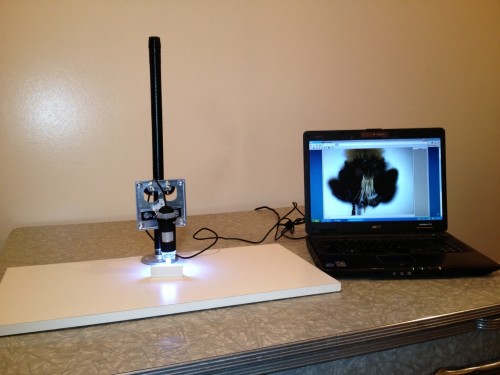
Plug the camera into your computer, run the simple software that comes with the USB Microscope and you’re in business!
The USB Microscope is certainly no replacement for even a half-decent dissecting microscope, but I think it works well enough to use in a classroom or an outreach event and allows you to show people why insects are so cool! Here’s a sample image of a Laphria robber fly straight out of the camera (the camera wasn’t at full magnification in this instance):
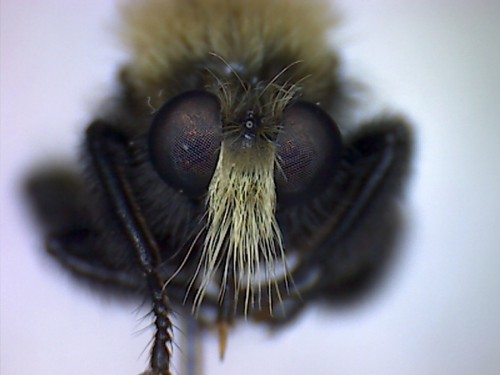
Certainly not going to win any photography contests, but I’d say it’s more than sufficient for showing off the small stuff. Bonus:you can show live insects moving around in video mode, or even record video to share later!
I’ll see how it works next weekend when I help out with our big university-wide open house, but I’d certainly love to hear what you think and whether there are any modifications you would suggest!

Hi, Morgan.
Consider a rack-and-pinion mount for your USB device, pillaged from an old microscope. You can then grab a series of images at different focus levels and combine them with focus-stacking software:
http://zerenesystems.com/cms/stacker
I do this by hand with a microscope-mounted ‘consumer’ digital camera, and get great results.
Hey Bob,
Sorry I missed seeing you at the QM last week, but being in the Sunshine Coast Hinterlands beats Brisbane any day. Some nice Scolopendra here and possibly some even nicer Discozercon.
Morgan – thanks for this. I’ve been wondering how I would ever afford a microscope in my retirement, but by then inexpensive digital scopes may be the norm. I certainly hope so.
Cheers,
Dave
You, my friend, are a taxahacker.
I’ve got a DinoXcope I bought on ThinkGeek a couple years ago. It came with a flexible metal stand (snakelike and semi-rigid, but still bendable). I’ve since seen the same kind of stand in Walmart as a base for small desk lamps.
I went looking on ebay to see if anyone sells those bases stand-alone for cost comparison. I didn’t immediately find them, but did run across several 2MP USB microscopes (with stand) shipping from Hong Kong for “buy now” prices around $30 like this one.
When I lived in a shack in Virginia between 2010-2012, the insects used to come right to my desk and I got a lot of great shots. I’m still trying to identify what is going on inside this transparent mayfly that I dubbed the pulse engine (as I’m not an entomologist, just a curious amateur).
I have the cheapest of the cheap version of this camera.
It works fine but it comes with no software and can take some time and tinkering to get working properly (ie: downloading drivers and finding software etc). Even then it’s prone to freezing. but other than that…